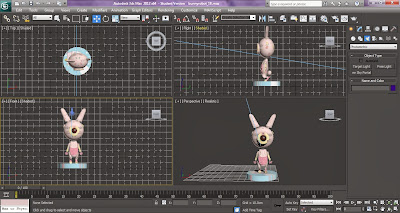
The Making of Bunny Robot
Making a 3D modeling robot
Planning stage:
-Modeling a head and ears
-Modeling a body
-Modeling legs
Image references
Modeling a head and ears
1) First step that we need to do before making the 3D model is the plane as the guide.Then insert the front
view,back view and both left and right side view as your guide.
2) After doing that,we can start with the head.We can used the sphere shape from the "Standard Primitives"
as the basic for the head.
located a the middle of the face.
4) Next is the outer part of the eye shown above. We can used the torus shape and resize it by using the
scale.To make the three hole part we can used cylinder and duplicate the cylinder into three then by using
Boolean form the compound object we can get that kind of hole.
5) To make the red part which is the eyes,we can used the sphere shape.After resize it using the scale,next
is to convert it into "editable poly" and cut it into half. The two cylinder which located at the upper of the
head are the screws where I used make it from the cylinder and duplicated it into two same size cylinder.
6) Next step is the making of the bunny ears.The ears are made form the capsule shape which can be found
at the "Extended Primitives".From the capsule shape,we converted it into "editable poly".Then we can
resize the ears shape shown above.
7) After that,placed the ears onto the head like
shown at right.The other ear we can duplicate it
and place at the left side as the left ear.
Modeling a Body
1) First thing to do is to make the body shape.The shape that we can used for the body is the capsule.Then
converted it into "editable poly".By using the edges and vertex in the editable poly,we could size the body
shape by following the image on the plane as the guide.
2) Then continue to make the other part of the body.Shown above are the left hand of the robot.
3) The components used to make these hand are the cylinder,capsule and the line.The using of line is to
make the robot palm.All the part need to be converted into editable poly before we can shaped it by
using vertex,edges or polygon in the modifier.
Modeling Legs
1) For the legs part,I also using the capsule shape as the basic shape.Then converted it into editable poly by
right hand click.
2) Using the same method like the others,used the vertex and the edges in the editable poly to reshape and resize it.Used the guide image from the plane as your guide to make it easier to reshape.
3) The other part of the leg are also make of capsule.Then resize it by the scale and the modifier after
converted it into editable poly.
4) As for the leg palm, the line are used to shape the leg.Then converted into the editable poly to extrude
and to bevel to get the shape for the leg palm.
Combining the shape
2) First we need to group the part such as the hand.Then clone it and modify it as mirror to have two same hand.Then secondly we group the leg and also following the same method which by clone and mirror
it.Then placed it at the right side.
3) As shown picture above,we have almost complete body part for the robot.
Texturing
Bunny robot without texturing
1) To texturing the robot first open the " material editor" or just click "M".
2) Then click at the diffuse and go to bitmap.
3) Select bitmap and click "ok".Then select the bitmap image file to choose your own texturing image.
4) Shown above is the complete texturing bunny robot.
5) These are the view from the top view,right view,left view and the complete front view with it stage.
Complete Robot Bunny


No comments:
Post a Comment